

That's how I look at it because, for some reason, Baked Alaska is one of those things I've always wanted to make! I'm really not sure why - maybe it's just the presence of ice cream that I always want to eat but there's something special about a Baked Alaska, an element of surprise. When I first got my little kitchen blow torch last Christmas, I knew I'd eventually make my way to this dessert. It feels good to finally have a go at it!
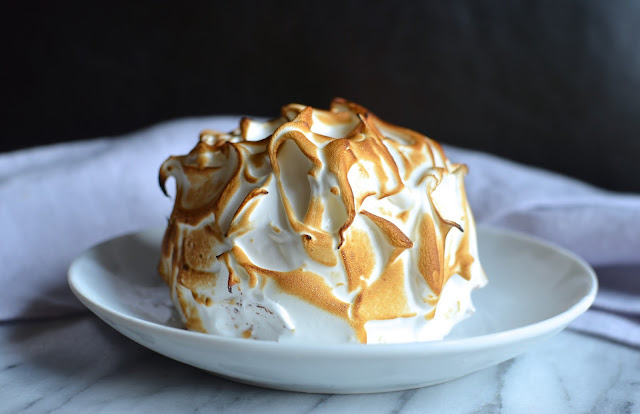
I made these as our "back to school" cake(s) this year. Celebrating the first day back to school is a great reason to make and eat cake! I am very lucky - and grateful - that my husband was home to help me photograph these torched mounds of ice cream cake! With hands sticky with meringue and thoughts of melting ice cream, it was a luxury to have a helper snap some pics for me. He is such a good sport to go along with this hobby of mine. I pay him back with dessert, and he seems happy with this arrangement.
 A Baked Alaska is basically an ice cream cake encased in a snowy, billowy mound of torched meringue. It's fascinating to look at, fun to cut into, and delicious to eat! It takes a few steps to make but you can do it ahead and try to keep it as simple as possible. I'm giving my ice cream maker a well-deserved break and used store-bought ice cream.
I started by making a chocolate cake base, scaling down this recipe from Martha. I really love the idea of neapolitan flavors in a Baked Alaska but instead of trying to make layers in my small Alaskas, I went with mint chocolate chip ice cream and just one base layer of cake at the bottom (you could alternate layers of cake and ice cream if you want). This chocolate cake recipe is perfect for ice cream cake - so moist and since it's made with oil, it doesn't harden like a rock in the freezer.
 I used small glass prep bowls to make my mini Baked Alaskas and you could use anything from teacups to bowls or a cake mold. Or make one large Baked Alaska instead. Just spray the bowl with cooking spray and line it with plastic wrap, leaving plenty of overhang. Then pack in a good-quality, creamy, dense ice cream before sealing it with the cake layer that will become the bottom. It's easy to take the chocolate sponge cake you've baked and cut out the size you need by inverting the cup or bowl you're using for the mold and cutting out the rounds you need. This can (and should be) assembled ahead and kept in the freezer until show time - when you make the meringue, apply it liberally onto the frozen, molded cakes, and torch it!
 I coated the cakes with a thick layer (insulation, really...) of Swiss meringue before giving it a quick, thorough pass with the kitchen blow torch. You can actually bake the cakes in a very hot oven but I think the blow torch is very quick and effective here. In an instant, you achieve beautiful-to-look-at as well as delicious peaks of toasted meringue.
 I'm happy I finally got to make my Baked Alaska. It's most definitely a very special treat.

I started by making a chocolate cake base, scaling down this recipe from Martha. I really love the idea of neapolitan flavors in a Baked Alaska but instead of trying to make layers in my small Alaskas, I went with mint chocolate chip ice cream and just one base layer of cake at the bottom (you could alternate layers of cake and ice cream if you want). This chocolate cake recipe is perfect for ice cream cake - so moist and since it's made with oil, it doesn't harden like a rock in the freezer.


