
One of the fun things we did recently on vacation in Aruba was having dinner in a Brazilian steakhouse, a churrascaria, featuring amazing grilled meats that are brought table-side in skewers, sliced to order. It's an endless parade of succulent barbecued meats you enjoy with a generous buffet of side dishes.

Throughout the years, the idea of going to a churrascaria had popped up but we never actually found the occasion to go. My husband and I thought our meat-loving "little" guy (who is almost a teenager now!) would enjoy it so we took advantage of going to one when we were in Aruba. We were right about the young one enjoying it; in fact, we all loved it.
I could go on and on about the delectable meat - the juicy and succulent picanha (top sirloin) cut and such - but what I wanted to focus on here today is something that was served in a little bread basket at our table at the steakhouse. They turned out to be Brazilian cheese bread, or small cheese rolls or puffs, called pão de queijo.
 My husband fell hard for these little rounds of cheese bread! I thought they were good (I mean, it's cheesy bread so what's not to like) but I have to admit I was more focused on eating Brazilian black beans, rice, and sampling all the meat. But I do remember the rolls - particularly not only for their great cheesy flavor but the uniquely chewy texture that made them so interesting.
They are not your typical fluffy, soft breads rolls but more like French gougeres but with a very different interior texture. Brazilian cheese bread is soft and slightly crisp on the outside but dense and incredibly chewy inside. The key is they're made with tapioca flour, which give it its distinctly chewy, stretchy texture.
 My husband was really smitten by the little Brazilian cheese bread and kept talking about it. So naturally, I came home and read up on it a little bit and decided to try making them after finding a recipe. It was a fun project and they turned out very well! My husband swears they're just like the ones we had at the restaurant. I say they're close enough and more importantly, we had a lot of fun talking about and tasting these at home. It's always fun to relive vacation memories and make them last by recreating it in some way.
First things first...you'll need to get your hands on tapioca flour for this recipe. It's what gives the Brazilian cheese bread its unique chewy, stretchy texture. That texture, along with the cheesy flavor, really makes them rather addicting.
 I followed the detailed recipe from The Kitchn. Since I was making half the recipe, I thought I could easily do it by hand, without a mixer (think pate a choux where you cook and stir the batter together), and while it is totally do-able, I'll warn you it's a serious arm workout! Even the small amount of dough I was working with gets very stiff so you'll really be working your arm muscles to mix the dough together by hand.
 The ingredients and process are pretty simple. It starts with heating milk and oil, to which you then add the tapioca flour. It will look odd and grainy, not at all smooth, like you see above. But once the dough cools down a bit and you work in the egg, it will come together a bit more though it will still be gelatinous. Then, you stir in parmesan cheese (I understand you can use other cheeses but for a beginner, it's good to start with parmesan; the result tasted like what we had at the restaurant so I'm happy to stick with it).
 Don't expect a smooth dough. Once the cheese is incorporated and the dough is done, it will still be very stretchy and sticky.
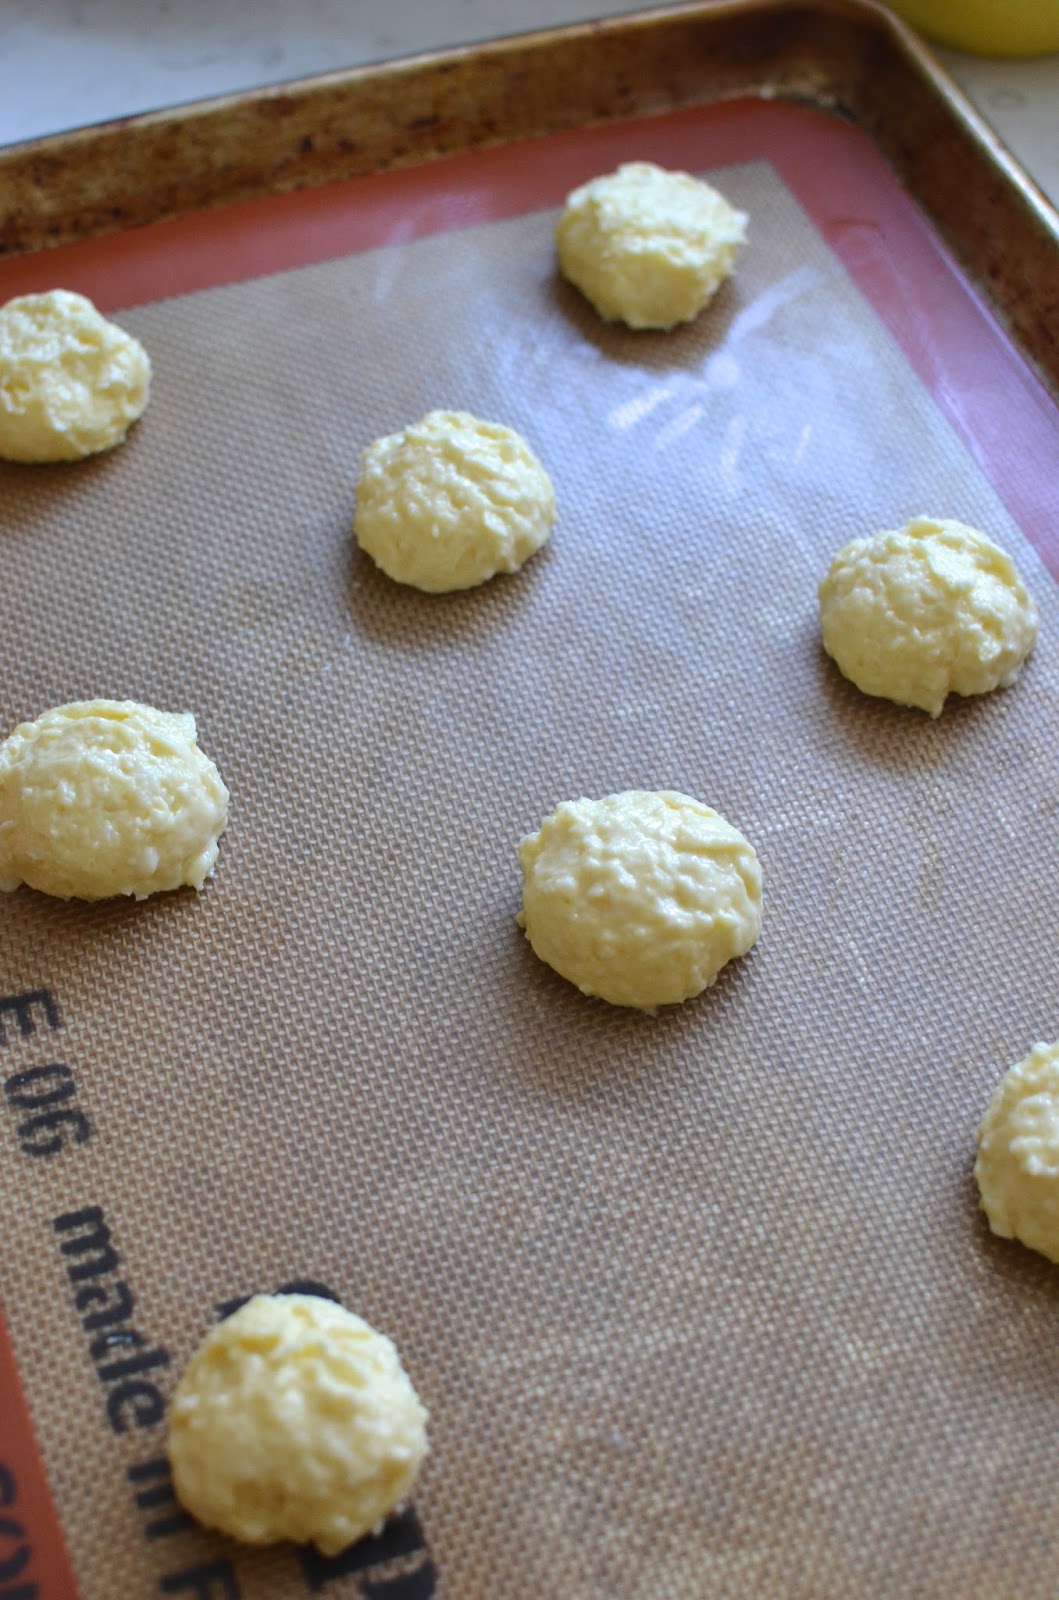
 To portion the dough into small balls or puffs, use an ice cream scoop. I used a 1 1/2 tablespoon size scoop. The key is to dip the scoop with water, in between each scoop, to prevent the dough from sticking so it releases easily onto your lined baking sheet. (If you have more than you need for one meal, a nice option is to freeze the scooped dough and bake them another day.)
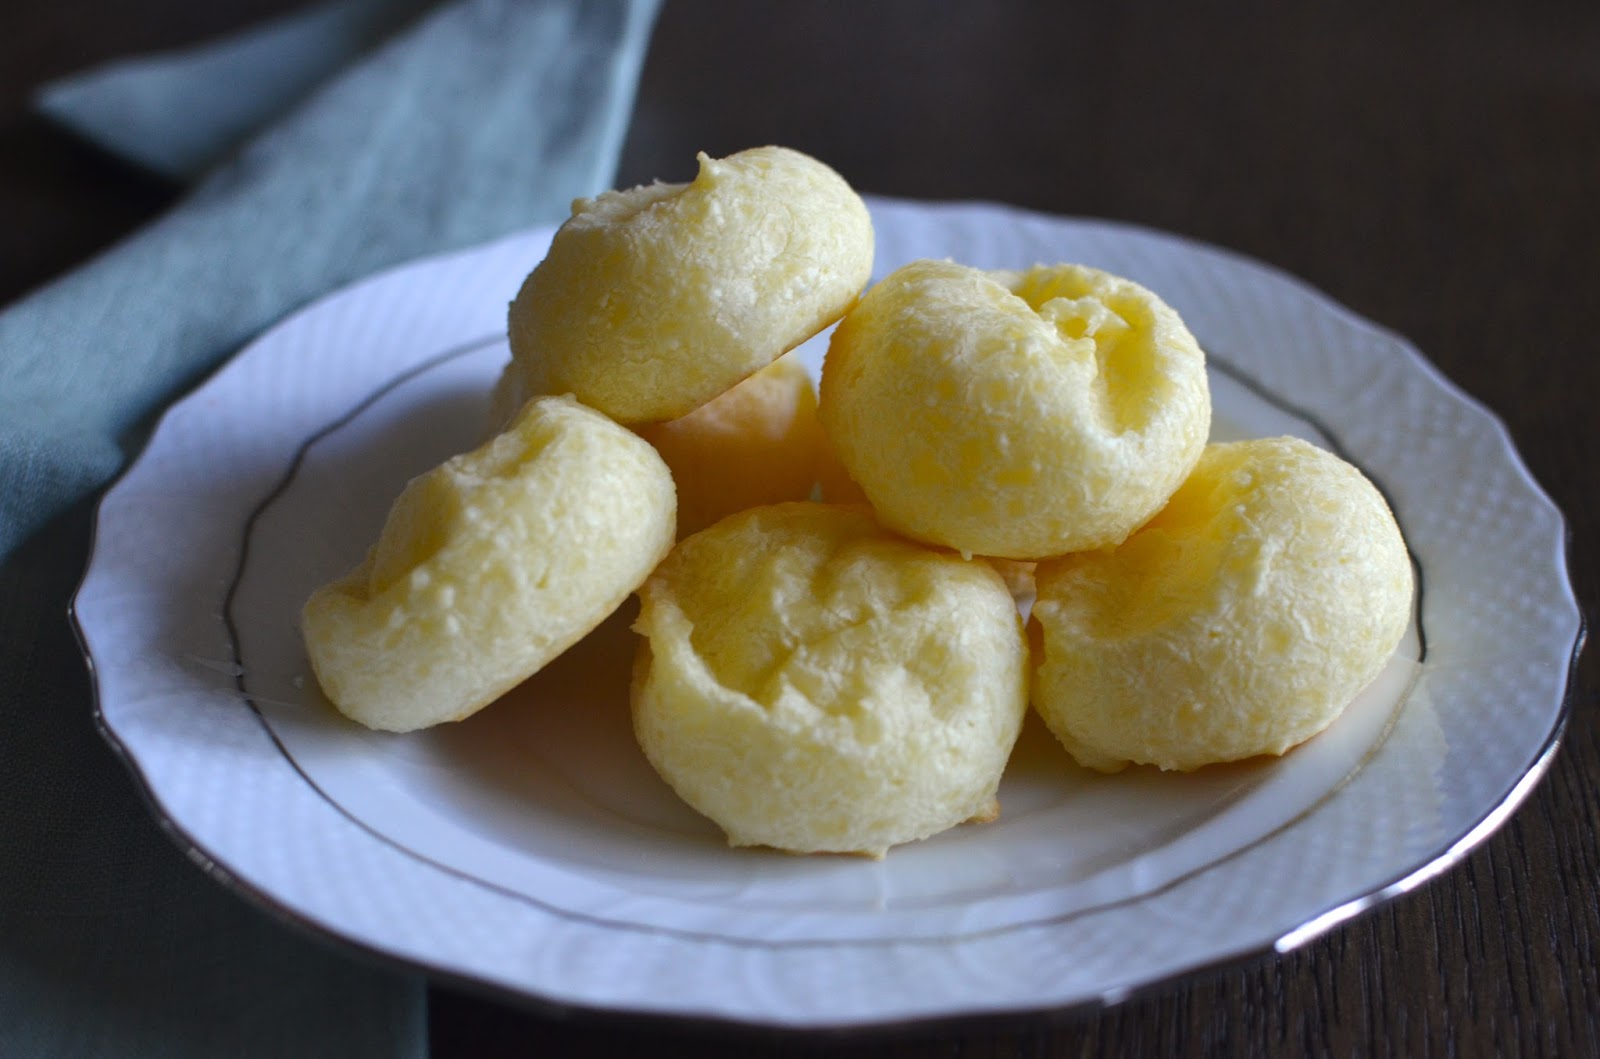
 They go into a hot, preheated 450 degree oven but once they go in, immediately turn the oven temp down to 350 degrees. Bake for 15 minutes, then rotate the pan(s) and bake for another 10-15 minutes, or until they are puffed and dry on the outside (they don't brown much). If I was quicker with the camera, I'd be able to show you how perfectly round and puffed they are straight out of the oven. Once you remove them from the oven, however, the rolls quickly deflate a little as they cool (*see update below). Serve the cheese bread warm.
 What a fun discovery these pão de queijo are, not to mention the whole churrasco experience we finally got a chance to experience. While we were in Aruba, we also had a great dinner at an Argentine steakhouse that's got us eager to fire up the grill and whip up some chimichurri to go with it! We also discovered pastechi, which is a cheese-filled fried pastry much like empanadas. I really love learning about regional foods and discovering new flavors and recipes. Knowing about this Brazilian cheese bread and now being able to make them for my family at home makes me so happy!
 There's nothing better than leisurely family meals, sitting around chatting and eating with your favorite people on earth.
*A little update: I recently took a few Brazilian cheese breads from the freezer and baked them up for a date dinner with my husband (alongside some risotto). Somewhat surprisingly, the puffs stayed puffed and did not deflate like my first batch did! They stayed as shown in the photo below up front (we had already taken a bite out of the puff in the background). While I wish I knew exactly what I did differently, I'd suggest making sure the puffs are thoroughly baked, until they turn lightly golden at the bottom. Deflated or not, they both taste good but aesthetically, I think we'd mostly agree that a nice round puff is more appealing. Making sure they're thoroughly baked also gives them a nice crispness in the shell that gives way to that chewy center.

Recipe:
Brazilian Cheese Bread (Pão de Queijo)
From The Kitchn
- Makes approximately 24 small puffs, depending on size -
1 cup whole milk
1/2 cup vegetable oil
1 teaspoon salt
10 ounces (about 2 cups) tapioca flour
2 large eggs
1 to 1 1/2 cups grated parmesan cheese
Position oven racks in the upper and lower third positions. Preheat oven to 450 degrees. Line 2 baking sheets with parchment paper or silicon baking mats.
Place milk, oil, and salt into a medium saucepan and bring to a gentle boil over medium heat, stirring occasionally. Once you see big bubbles coming through the milk, remove the pan from the heat.
Add all the tapioca flour and stir with a wooden spoon until incorporated and there are no spots of dry flour. It will look grainy and gelatinous at this point.
Transfer the dough to the bowl of a stand mixer fitted with the paddle attachment (the dough is very stiff so it will be a workout to do by hand). Beat the dough on medium speed for a few minutes to smooth it out and cool enough that you can touch the dough with your fingertips for a few seconds. On medium-speed, beat the eggs into the dough, one at a time, incorporating well after each. Scrape down the sides of the bowl. Beat in the cheese until well blended. The finished dough will be sticky and stretchy, and not completely smooth.
Set a small bowl of water nearby. Dip a small ice cream scoop (I used a 1 1/2 tablespoon size) in water and portion rounds onto the prepared baking sheets, spaced about 1 1/2 to 2 inches apart. Dip the scoop in water each time to prevent sticking.
Place baking sheets into the oven and immediately turn the oven temperature down to 350 degrees. Bake for 15 minutes, then rotate the baking sheets and continue baking for another 10-15 minutes, or until cheese bread is puffed and dry on the outside and just starting to turn lightly golden on the bottom (they do not brown much on top). Remove from the oven, cool slightly and serve warm.
Storage and make-ahead option: Store cooled leftover cheese bread in the refrigerator for up to a week and re-warm them in the oven for a few minutes before serving. You can also freeze scooped dough mounds and bake, straight from the freezer, as directed above.
I could go on and on about the delectable meat - the juicy and succulent picanha (top sirloin) cut and such - but what I wanted to focus on here today is something that was served in a little bread basket at our table at the steakhouse. They turned out to be Brazilian cheese bread, or small cheese rolls or puffs, called pão de queijo.

They are not your typical fluffy, soft breads rolls but more like French gougeres but with a very different interior texture. Brazilian cheese bread is soft and slightly crisp on the outside but dense and incredibly chewy inside. The key is they're made with tapioca flour, which give it its distinctly chewy, stretchy texture.

 |
| Weekend dinner! This meal featured Jacque Pepin's recipe for crispy chicken thighs and of course, the Brazilian cheese bread |
First things first...you'll need to get your hands on tapioca flour for this recipe. It's what gives the Brazilian cheese bread its unique chewy, stretchy texture. That texture, along with the cheesy flavor, really makes them rather addicting.


*A little update: I recently took a few Brazilian cheese breads from the freezer and baked them up for a date dinner with my husband (alongside some risotto). Somewhat surprisingly, the puffs stayed puffed and did not deflate like my first batch did! They stayed as shown in the photo below up front (we had already taken a bite out of the puff in the background). While I wish I knew exactly what I did differently, I'd suggest making sure the puffs are thoroughly baked, until they turn lightly golden at the bottom. Deflated or not, they both taste good but aesthetically, I think we'd mostly agree that a nice round puff is more appealing. Making sure they're thoroughly baked also gives them a nice crispness in the shell that gives way to that chewy center.

Recipe:
Brazilian Cheese Bread (Pão de Queijo)
From The Kitchn
- Makes approximately 24 small puffs, depending on size -
1 cup whole milk
1/2 cup vegetable oil
1 teaspoon salt
10 ounces (about 2 cups) tapioca flour
2 large eggs
1 to 1 1/2 cups grated parmesan cheese
Position oven racks in the upper and lower third positions. Preheat oven to 450 degrees. Line 2 baking sheets with parchment paper or silicon baking mats.
Place milk, oil, and salt into a medium saucepan and bring to a gentle boil over medium heat, stirring occasionally. Once you see big bubbles coming through the milk, remove the pan from the heat.
Add all the tapioca flour and stir with a wooden spoon until incorporated and there are no spots of dry flour. It will look grainy and gelatinous at this point.
Transfer the dough to the bowl of a stand mixer fitted with the paddle attachment (the dough is very stiff so it will be a workout to do by hand). Beat the dough on medium speed for a few minutes to smooth it out and cool enough that you can touch the dough with your fingertips for a few seconds. On medium-speed, beat the eggs into the dough, one at a time, incorporating well after each. Scrape down the sides of the bowl. Beat in the cheese until well blended. The finished dough will be sticky and stretchy, and not completely smooth.
Set a small bowl of water nearby. Dip a small ice cream scoop (I used a 1 1/2 tablespoon size) in water and portion rounds onto the prepared baking sheets, spaced about 1 1/2 to 2 inches apart. Dip the scoop in water each time to prevent sticking.
Place baking sheets into the oven and immediately turn the oven temperature down to 350 degrees. Bake for 15 minutes, then rotate the baking sheets and continue baking for another 10-15 minutes, or until cheese bread is puffed and dry on the outside and just starting to turn lightly golden on the bottom (they do not brown much on top). Remove from the oven, cool slightly and serve warm.
Storage and make-ahead option: Store cooled leftover cheese bread in the refrigerator for up to a week and re-warm them in the oven for a few minutes before serving. You can also freeze scooped dough mounds and bake, straight from the freezer, as directed above.